Overengineering a mirror - Part 2: Setting up the hardware
While the cluster is now ready, we still need to do all the hardware parts before integrating everything. More specifically, we need to figure out how to capture video from the kinect, how to mount the kinect to the tv and how to make some space in the room.
This is the second out of 3 of this posts series:
- Part 1: Network Booting
- Part 2: Hardware Setup
- Part 3: K8s Deployment
Getting video from the Kinect
So, the first step is to connect the Kinect to our PC and get some output, ideally with a low-enough latency and in an easy-to-use form.
Kinect V1 and V2 comparison
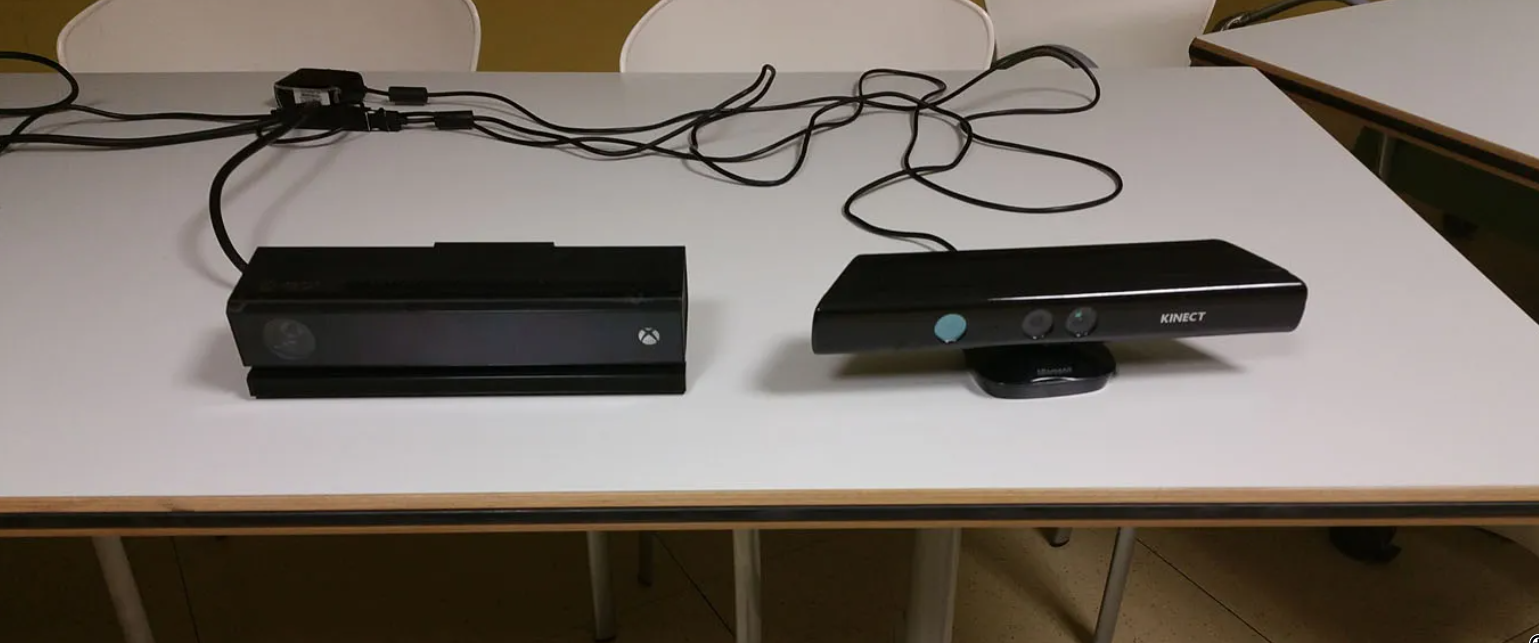
There are two “main” revisions of the Kinect (we’re excluding the xbox vs windows versions as they are basically the same except for the cable):
- The Kinect V1 released in 2010 with the Xbox 360
- The Kinect V2 released in 2013 with the Xbox One
Of course, the main characteristic of the Kinect is that it’s not a “simple” camera, but rather a device composed of:
- A color camera (480p for the V1 and 1080p for the V2)
- A microphone array
- A depth-sensor (IR grid + IR camera on the V1, Time of Flight on the V2)
- And of course an associated SDK that makes the depth data easy to manipulate (like skeleton/joints/hands tracking)
While the SDK is pretty extensive and easy to use on Windows, on Linux it’s a totally different story.
There are very old frameworks called OpenNI / OpenNI2 (for the v1 and V2 respectively), with modules for the v1. But the actual algorithms used to make the joints tracking easy to use are in another piece of software called NITE, which was always closed-source (and is now long dead). Furthermore, when Apple acquired PrimeSense (the company that manufactured the kinect’s sensors, which is basically the same tech as FaceID), they took down all the websites (for example openni.org now redirects to their website).
So you unless you want to struggle to compile decades-old and unmaintained software, you can pretty much forget taking advantage of the tracking algos on Linux (and the progress of specialized AI models makes this less and less interesting anyways).
Fortunately, there was an opensource implementation effort to get at least basic data from the sensors with:
- libfreenect for the V1
- libfreenect2 for the V2
I have both models at home, and use the V1 as my desktop webcam since the resolution doesn’t matter that much for this use case, however I definitely want to use the V2 for displaying on a TV.
Getting video for the V1 is as easy as installing libfreenect: yay -S libfreenect.
Then after plugging the Kinect a new video device appears, so you can directly use this in any software that supports using /dev/videoX devices (ex: ffplay /dev/video0).
For the V2, it’s a bit more complicated, as the AUR package doesn’t compiles (and ideally, I want this in a debian container). So let’s take a closer look.
Another thing to keep in mind is that the V2 requires a much higher USB bandwidth, so USB 3 ports are required. I tested with a RPi 4, but it still struggled to keep a decent framerate, so I switched to the dell mini-pc.
Compiling libfreenect2
We can use the PKGBUILD file of the AUR package as a reference for installation instructions.
Some comments on the package’s page suggests to add DCMAKE_POLICY_VERSION_MINIMUM=3.5 to CMake options to fix the current issues.
I faced another error, this time during compilation and found that commenting out s:const int CL_ICDL_Version fixed this issue.
So after installing the deps and cloning the repo:
apt-get install -y build-essential git cmake opencl-headers pkg-config libjpeg62-turbo-dev libturbojpeg0-dev libusb-1.0-0-dev libglfw3-dev ocl-icd-opencl-dev libopencv-devgit clone https://github.com/OpenKinect/libfreenect2 /tmp/libfreenect2 && cd /tmp/libfreenect2/ && git checkout fd64c5d9b214df6f6a55b4419357e51083f15d93
We can finally compile libfreenect2:
cd /tmp/libfreenect2 && mkdir build && cd build
sed --debug -i -e 's:const int CL_ICDL_VERSION:// const int CL_ICDL_VERSION:' "../src/opencl_depth_packet_processor.cpp" "../src/opencl_kde_depth_packet_processor.cpp" && \
cmake ".." \
		-DCMAKE_INSTALL_PREFIX=/usr \
		-DCMAKE_BUILD_TYPE=Release \
		-DENABLE_CXX11=ON \
		-DENABLE_OPENCL=ON \
		-DENABLE_OPENGL=OFF \
		-DENABLE_CUDA=OFF \
		-DBUILD_EXAMPLES=OFF \
		-DBUILD_SHARED_LIBS=OFF \
		-DCMAKE_POLICY_VERSION_MINIMUM=3.5 && \
	make
After running make install you should be able to execute the demo program with: /usr/bin/Protonect.
If everything went well, you should now see a window with the live images for the multiple kinect’s sensors.
Adding a frame grabber
But it’s not yet finished for the video acquisition part as, unlike the KinectV1, the V2’s libfreenect doesn’t provides a /dev/videoX device from which we can easily grab the frames.
Considering we only want to restream the color camera’s video to the tv (with low latency), we just need to find a way to capture the raw frames from the kinect and somehow put them in the video framebuffer.
Reading the issues and pull-requests on the libfreenectv2 repo regarding this matter, I found the following PR from which I copied most of my code.
I slightly modified it to directly write the raw frames to stdout (the logs are sent to stderr), remove the dependency on opencv for color space conversion (and also add a frame limiter, but this was mostly used for testing).
Now, we just need to add this file and the CMakeLists file in a frame_grabber folder and reference our project in the main CMakeLists file with ADD_SUBDIRECTORY(\${MY_DIR}/examples/frame_grabber) for it to be build during libfreenect2 compilation.
#include <iostream>
#include <cstdlib>
#include <signal.h>
#include <fcntl.h>
#include <sys/ioctl.h>
#include <errno.h>
#include <string.h>
#include <chrono>
#include <thread>
#include <unistd.h>
//#include <opencv2/opencv.hpp>
#include <libfreenect2/libfreenect2.hpp>
#include <libfreenect2/frame_listener_impl.h>
#include <libfreenect2/registration.h>
#include <libfreenect2/packet_pipeline.h>
#include <libfreenect2/logger.h>

// adapted from: https://github.com/OpenKinect/libfreenect2/pull/1197

// example usage: /usr/bin/frame_grabber 60 | ffplay -max_delay 0 -max_probe_packets 1 -analyzeduration 0 -flags +low_delay -fflags +nobuffer -f rawvideo -pixel_format bgra -video_size 1920x1080 -

bool protonect_shutdown = false;

void sigint_handler(int s)
{
  protonect_shutdown = true;
}

void write_frame(unsigned char *rgb_data, int width, int height)
{
  /*
  cv::Mat frame(height, width, CV_8UC4, rgb_data);
  cv::Mat bgr_frame;
  cv::cvtColor(frame, bgr_frame, cv::COLOR_BGRA2BGR);
  std::cout.write(reinterpret_cast<const char*>(bgr_frame.data), bgr_frame.total() * bgr_frame.elemSize());
  */
  size_t frame_size = width * height * 4; // 4 bytes per pixel (BGRA)
  std::cout.write(reinterpret_cast<const char*>(rgb_data), frame_size);
}

int main(int argc, char *argv[])
{
  // Maximum stdout optimizations
  std::ios_base::sync_with_stdio(false);
  std::cin.tie(nullptr);
  std::cout.tie(nullptr);

  // Set stdout to full buffering with large buffer for maximum throughput
  setvbuf(stdout, nullptr, _IOFBF, 65536);

  int max_fps = 0; // 0 means no limit

  // Parse command line arguments for FPS limit
  if (argc > 1) {
    max_fps = std::atoi(argv[1]);
    if (max_fps <= 0) {
      std::cerr << "Invalid FPS value: " << argv[1] << ". FPS must be positive." << std::endl;
      return -1;
    }
    std::cerr << "FPS limit set to: " << max_fps << std::endl;
  }

  auto frame_duration = std::chrono::microseconds(0);
  if (max_fps > 0) {
    frame_duration = std::chrono::microseconds(1000000 / max_fps);
  }

  libfreenect2::Freenect2 freenect2;
  libfreenect2::Freenect2Device *dev = nullptr;
  libfreenect2::PacketPipeline *pipeline = nullptr;

  libfreenect2::setGlobalLogger(libfreenect2::createConsoleLogger(libfreenect2::Logger::None));

  if (freenect2.enumerateDevices() == 0)
  {
    std::cerr << "No device connected!" << std::endl;
    return -1;
  }

  std::string serial = freenect2.getDefaultDeviceSerialNumber();

  dev = freenect2.openDevice(serial);

  if (dev == nullptr)
  {
    std::cerr << "Failure opening device!" << std::endl;
    return -1;
  }

  signal(SIGINT, sigint_handler);

  libfreenect2::SyncMultiFrameListener listener(libfreenect2::Frame::Color);
  libfreenect2::FrameMap frames;

  dev->setColorFrameListener(&listener);

  if (!dev->start())
    return -1;

  std::cerr << "Device serial: " << dev->getSerialNumber() << std::endl;
  std::cerr << "Device firmware: " << dev->getFirmwareVersion() << std::endl;

  auto last_frame_time = std::chrono::steady_clock::now();

  while (!protonect_shutdown)
  {
    if (!listener.waitForNewFrame(frames, 10 * 1000)) // 10 seconds
    {
      std::cerr << "Timeout!" << std::endl;
      return -1;
    }

    // FPS limiting logic
    if (max_fps > 0) {
      auto current_time = std::chrono::steady_clock::now();
      auto elapsed = current_time - last_frame_time;

      if (elapsed < frame_duration) {
        std::this_thread::sleep_for(frame_duration - elapsed);
      }
      last_frame_time = std::chrono::steady_clock::now();
    }

    libfreenect2::Frame *rgb = frames[libfreenect2::Frame::Color];

    write_frame(rgb->data, rgb->width, rgb->height);

    listener.release(frames);
  }

  dev->stop();
  dev->close();
  return 0;
}
CMAKE_MINIMUM_REQUIRED(VERSION 2.8.12.1)

if(WIN32 AND NOT MINGW)
  if(NOT DEFINED CMAKE_DEBUG_POSTFIX)
    set(CMAKE_DEBUG_POSTFIX "d")
  endif()
endif()

IF(NOT DEFINED CMAKE_BUILD_TYPE)
  # No effect for multi-configuration generators (e.g. for Visual Studio)
  SET(CMAKE_BUILD_TYPE RelWithDebInfo CACHE STRING "Choose: RelWithDebInfo Release Debug MinSizeRel None")
ENDIF()

PROJECT(frame_grabber)

SET(MY_DIR ${libfreenect2_examples_SOURCE_DIR})
SET(DEPENDS_DIR "${MY_DIR}/../depends" CACHE STRING "Dependency directory")

OPTION(ENABLE_OPENGL "Enable OpenGL support" ON)

# The example build system is standalone and will work out-of-tree with these files copied
SET(freenect2_ROOT_DIR ${MY_DIR}/../..)
SET(flextGL_SOURCES ${freenect2_ROOT_DIR}/src/flextGL.cpp)
SET(flextGL_INCLUDE_DIRS ${freenect2_ROOT_DIR}/src) # for flextGL.h

FIND_PACKAGE(PkgConfig)    # try find PKGConfig as it will be used if found
LIST(APPEND CMAKE_MODULE_PATH ${freenect2_ROOT_DIR}/cmake_modules) # FindGLFW3.cmake

FIND_PACKAGE(OpenCV REQUIRED)
SET(RESOURCES_INC_FILE "${PROJECT_BINARY_DIR}/resources.inc.h")

IF(TARGET freenect2)
  MESSAGE(STATUS "Using in-tree freenect2 target")
  SET(freenect2_LIBRARIES freenect2)
  SET(freenect2_DLLS ${LIBFREENECT2_DLLS})
ELSE()
  FIND_PACKAGE(freenect2 REQUIRED)
  # Out-of-tree build will have to have DLLs manually copied.
ENDIF()


INCLUDE_DIRECTORIES(
  "/usr/include/opencv4"
  ${freenect2_INCLUDE_DIR}
)
add_compile_options(-fexceptions)
SET(frame_grabber_src
  frame_grabber.cpp
)

SET(frame_grabber_LIBRARIES
  ${freenect2_LIBRARIES}
)

SET(frame_grabber_DLLS
  ${freenect2_DLLS}
)

ADD_EXECUTABLE(frame_grabber
  ${frame_grabber_src}
)

TARGET_LINK_LIBRARIES(frame_grabber
  ${frame_grabber_LIBRARIES}
  opencv_core
  opencv_highgui
  ${OpenCV_LIBS}
)

IF(WIN32)
  INSTALL(TARGETS frame_grabber DESTINATION bin)
  LIST(REMOVE_DUPLICATES frame_grabber_DLLS)
  FOREACH(FILEI ${frame_grabber_DLLS})
    ADD_CUSTOM_COMMAND(TARGET frame_grabber POST_BUILD
      COMMAND ${CMAKE_COMMAND} -E copy_if_different ${FILEI} $<TARGET_FILE_DIR:frame_grabber>
    )
  ENDFOREACH(FILEI)
INSTALL(TARGETS frame_grabber DESTINATION bin)
  INSTALL(FILES ${frame_grabber_DLLS} DESTINATION bin)
ENDIF()
INSTALL(TARGETS frame_grabber DESTINATION bin)
Usage
Our frame_grabber is now outputing the raw color frames from the kinect. To display them, we can use ffplay (part of ffmpeg), since there’s no encoding, we need to specify the characteristics of the video directly to ffplay as cli args.
The following command can be used to display the video: ./frame_grabber | ffplay -f rawvideo -pixel_format bgra -video_size 1920x1080 - (note the - at the end to get the video from the stdin).
We can add a few other parameters to reduce latency (honestly I don’t know which ones are really useful, but I’m too lazy to test them independently): ./frame_grabber | ffplay -autoexit -max_delay 0 -max_probe_packets 1 -analyzeduration 0 -flags +low_delay -fflags +nobuffer -f rawvideo -pixel_format bgra -video_size 1920x1080 -
By default, ffplay will display the video in a new window if running with a desktop environment, but otherwise it will directly display the video on the framebuffer of a connected screen (which is exactly what we want !).
As a bonus, we can also first pipe the frames through ffmpeg and then to ffplay, that way the video is displayed on the tv in realtime but can also be encoded and streamed to other devices (ex: for recording).
To allow both modes, I created this simple script (controlled by an env var):
#!/bin/bash

if [ -z $RTSP_URL ]; then
    /app/frame_grabber | ffplay -autoexit -max_delay 0 -max_probe_packets 1 -analyzeduration 0 -flags +low_delay -fflags +nobuffer -f rawvideo -pixel_format bgra -video_size 1920x1080 -
else
    sleep 2
    /app/frame_grabber | ffmpeg -re -pix_fmt bgra -f rawvideo -video_size 1920x1080 -i pipe: -f rawvideo - -c:v libx264 -preset ultrafast -f rtsp $RTSP_URL -rtsp_transport tcp | ffplay -autoexit -max_delay 0 -max_probe_packets 1 -analyzeduration 0 -flags +low_delay -fflags +nobuffer -f rawvideo -pixel_format bgra -video_size 1920x1080 -
fi
Building the docker container
Now that everything is working, let’s package everything nicely as a docker container.
I’m using a two-stage build process: the first one to clone, patch and build libfreenect with our frame_grabber, and the second one to make a small image to deploy with only the required libs at runtime and our litte startup script.
FROM debian:13-slim AS builder

RUN apt-get update && apt-get install -y build-essential git cmake opencl-headers pkg-config libjpeg62-turbo-dev libturbojpeg0-dev libusb-1.0-0-dev libglfw3-dev ocl-icd-opencl-dev libopencv-dev

RUN git clone https://github.com/OpenKinect/libfreenect2 /tmp/libfreenect2 && \
	cd /tmp/libfreenect2/ && git checkout fd64c5d9b214df6f6a55b4419357e51083f15d93

COPY frame_grabber /tmp/libfreenect2/examples/frame_grabber

RUN cd /tmp/libfreenect2 && mkdir build && cd build && \
    echo "ADD_SUBDIRECTORY(\${MY_DIR}/examples/frame_grabber)" >> ../CMakeLists.txt && \
	sed --debug -i -e 's:const int CL_ICDL_VERSION:// const int CL_ICDL_VERSION:' "../src/opencl_depth_packet_processor.cpp" "../src/opencl_kde_depth_packet_processor.cpp" && \
	cmake ".." \
		-DCMAKE_INSTALL_PREFIX=/usr \
		-DCMAKE_BUILD_TYPE=Release \
		-DENABLE_CXX11=ON \
		-DENABLE_OPENCL=ON \
		-DENABLE_OPENGL=OFF \
		-DENABLE_CUDA=OFF \
		-DBUILD_EXAMPLES=OFF \
		-DBUILD_SHARED_LIBS=OFF \
		-DCMAKE_POLICY_VERSION_MINIMUM=3.5 && \
	make

FROM debian:13-slim

RUN apt-get update && apt-get install -y ffmpeg libturbojpeg0 libglfw3

COPY --from=builder /tmp/libfreenect2/build/bin/frame_grabber /app/frame_grabber

COPY launch.sh /app/launch.sh

RUN chmod +x /app/launch.sh

CMD ["/app/launch.sh"]
Other hardware used in this project
Since I want to automate as much things as possible in this project and that I also like to give a second life to old tech devices, I’ll also use the following devices (of course non of them are strictly required and there are actually much simpler solutions).
The RFXLAN
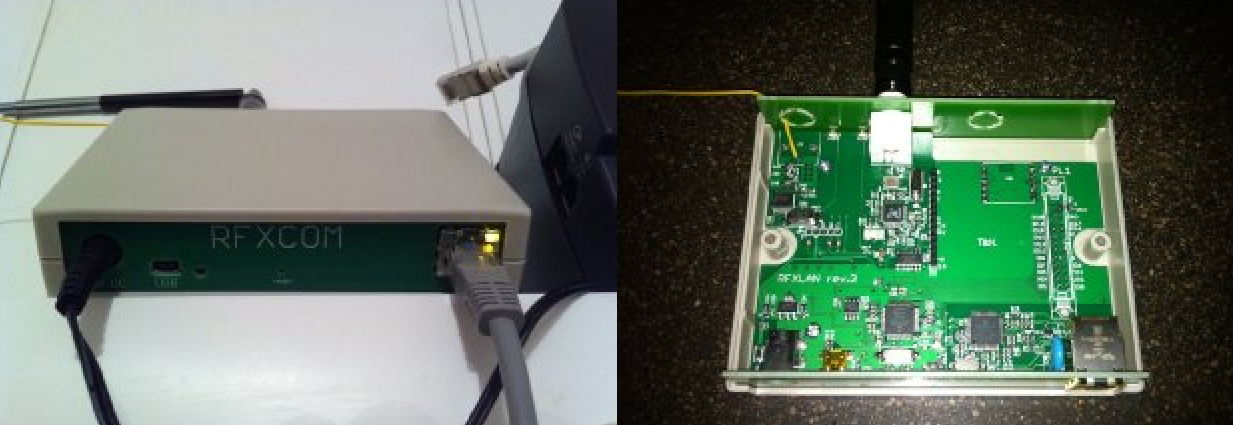
The RFXLAN is a now-deprecated device from RFXCOM that was used as an interface for home-automation systems to control 433 MHz devices (like alarm systems, temperature/humidity probes, remote-controlled plugs/lights …).
The particularity of this device was that unlike the other interfaces (that are still produced by rfxcom), I wasn’t required to attach it to the usb port used by your home-automation system but it was actually operated over the network. So you could just place the RFXLAN wherever you needed it as long as you had an ethernet cable (which is especially useful for radio non-meshed networks).
The issue with it is that the firmware is not opensource, not updated for at least a decade and uses an obscure protocol to communicate.
But to make it usable with Home-Assistant (and other modern systems), I have developped xpl2mqtt which translates the xPL protocol used by the RFXLAN to a more modern protocol, commonly used for IoT devices: MQTT.
In this project, it will be used to control an old smart plug (in 433 MHz) to automatically power on and off the Kinect.
The violet mir:ror
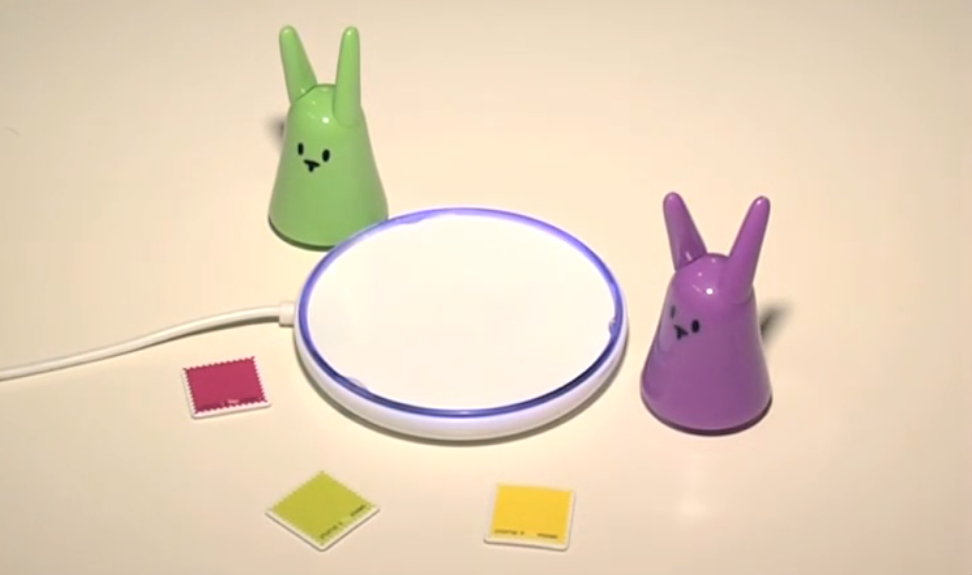
The mir:ror is a little usb RFID tag reader developed by violet (same manufacturer as the Nabaztag, one of the first IoT devices). This reader was designed to read tags embedded in little rabbit figurines as well as tiny rfid tags that you could stick to objects, once read by the mir:ror, a specific tag could perform any action on your computer.
Of course, with IoT the same story repeats over and over again: the object and its software on the PC was not opensource, it relied on cloud servers, the company went bankrupt and the server were shutdown, making all mir:ror unusable.
But fortunately, people didn’t wait for the device to stop working to reverse-engineer the usb protocol (which is just presented as a HID device), more information can be found on the nabaztag forum (mostly in french).
I developed a simple program to publish the tags ID to mqtt topics compatible with home-assistant: mirror-mqtt.
This device will be placed in front of the TV, to easily trigger the full automation by placing a rabbit on it when I want to start dancing.
A bit of DIY
Mounting the Kinect
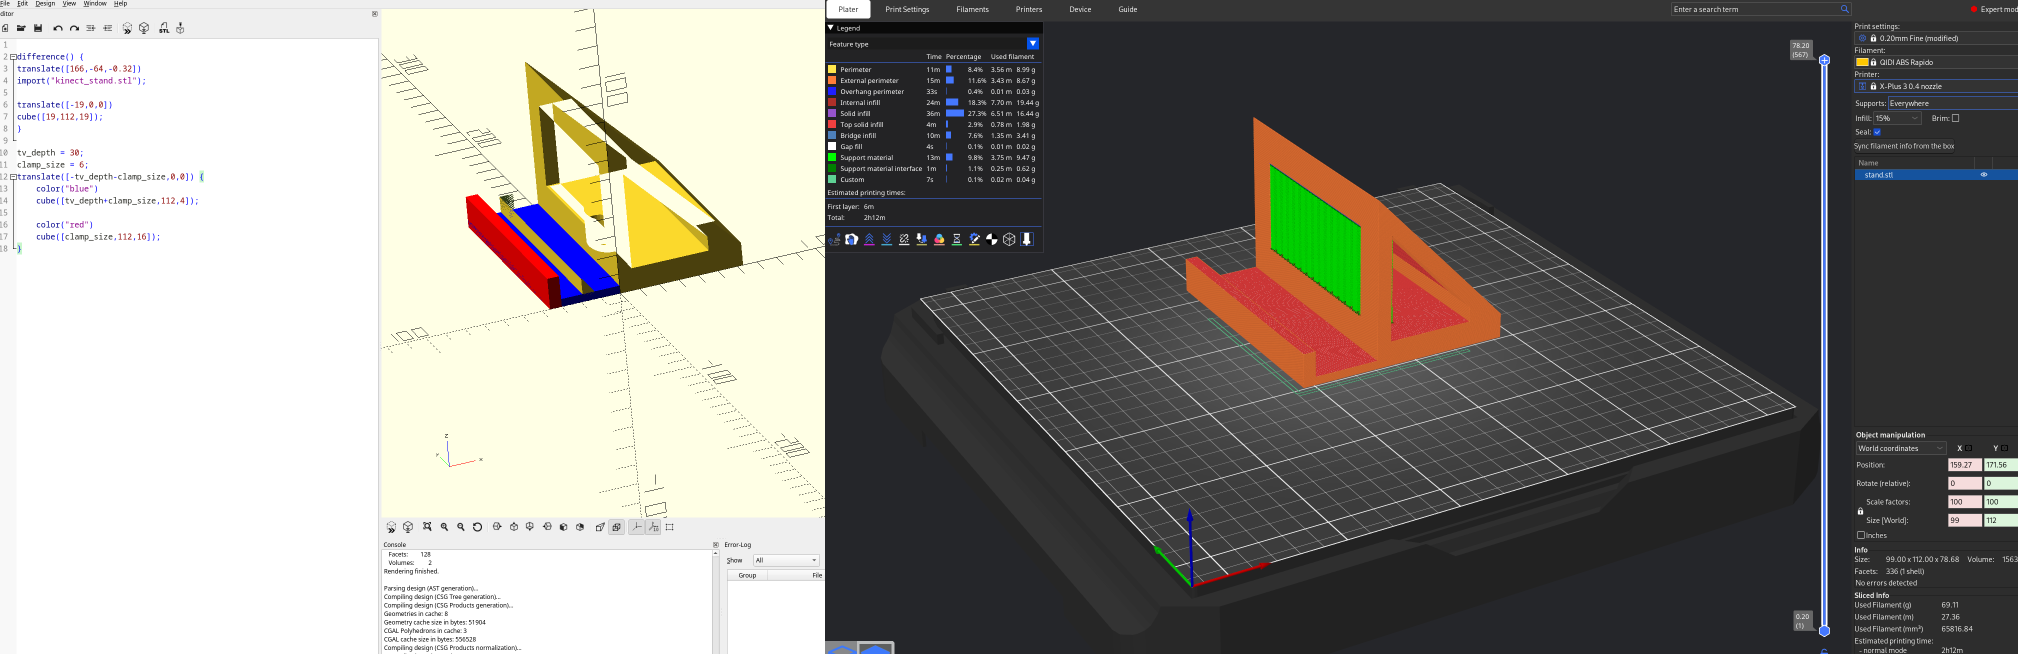
To mount the Kinect V2 on top of my TV, I 3D-printed a custom support.
The original file is taken from thingiverse.
I then used openscad to adapt it to my TV’s measurements and printed it in ABS with my printer (Qidi Tech X-Plus-3).
difference() {
    translate([166,-64,-0.32])
        import("kinect_stand.stl");

    translate([-19,0,0])
        cube([19,112,19]);
}

tv_depth = 30;
clamp_size = 6;
translate([-tv_depth-clamp_size,0,0]) {
    color("blue")
    cube([tv_depth+clamp_size,112,4]);

    color("red")
    cube([clamp_size,112,16]);
}
Adapting the bed
As noted in the first post, to be able to make some space in the room I need to be able to lift the bed in front of the TV.
My bed is an IKEA compact structure with a thick mattress on top of it. It’s already possible to lift it as-is, but since the supports are thin wood-ish pieces I would not recommend it. Also since the total thickness of the bed is about 60 cm, just doing a 90° rotation would mean that there must be this 60 cm gap between the bed and the wall (which is of course absolutely not practical in such a tiny room).
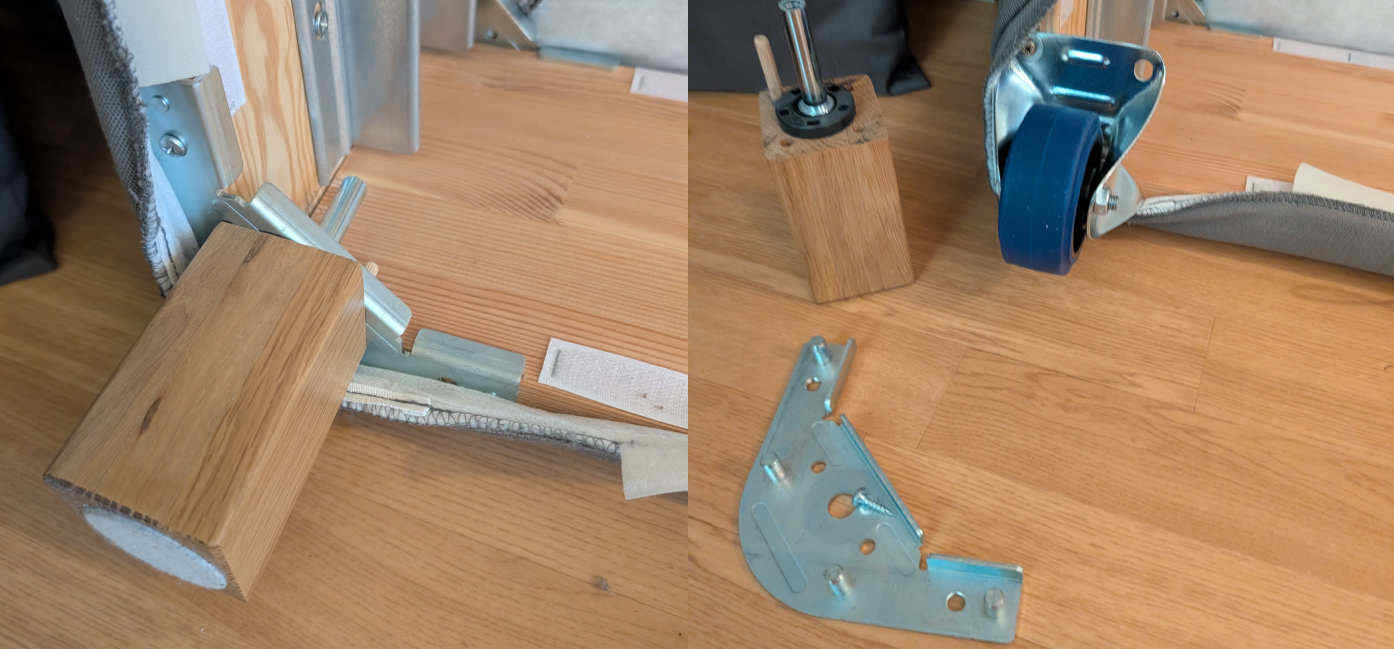
The solution for these problems is pretty easy: just swap the two back supports for two wheels (the two front ones are kept to keep the bed in place when in “normal” position). That way we can very easily rotate the bed (without risking to break the supports), and we can also easily translate it at the same time: so in normal position the bed can be put against the wall and when lifting it, I can move it forward a bit to have the 60 cm required to put it in a vertical position.
I’ve made sure to select fitting wheels both in terms of total height (compared to the wooden supports), weight tolerance and material (rubber wheels are ideal to protect the plastic floor and prevent the bed from moving when used) on a specialized website.
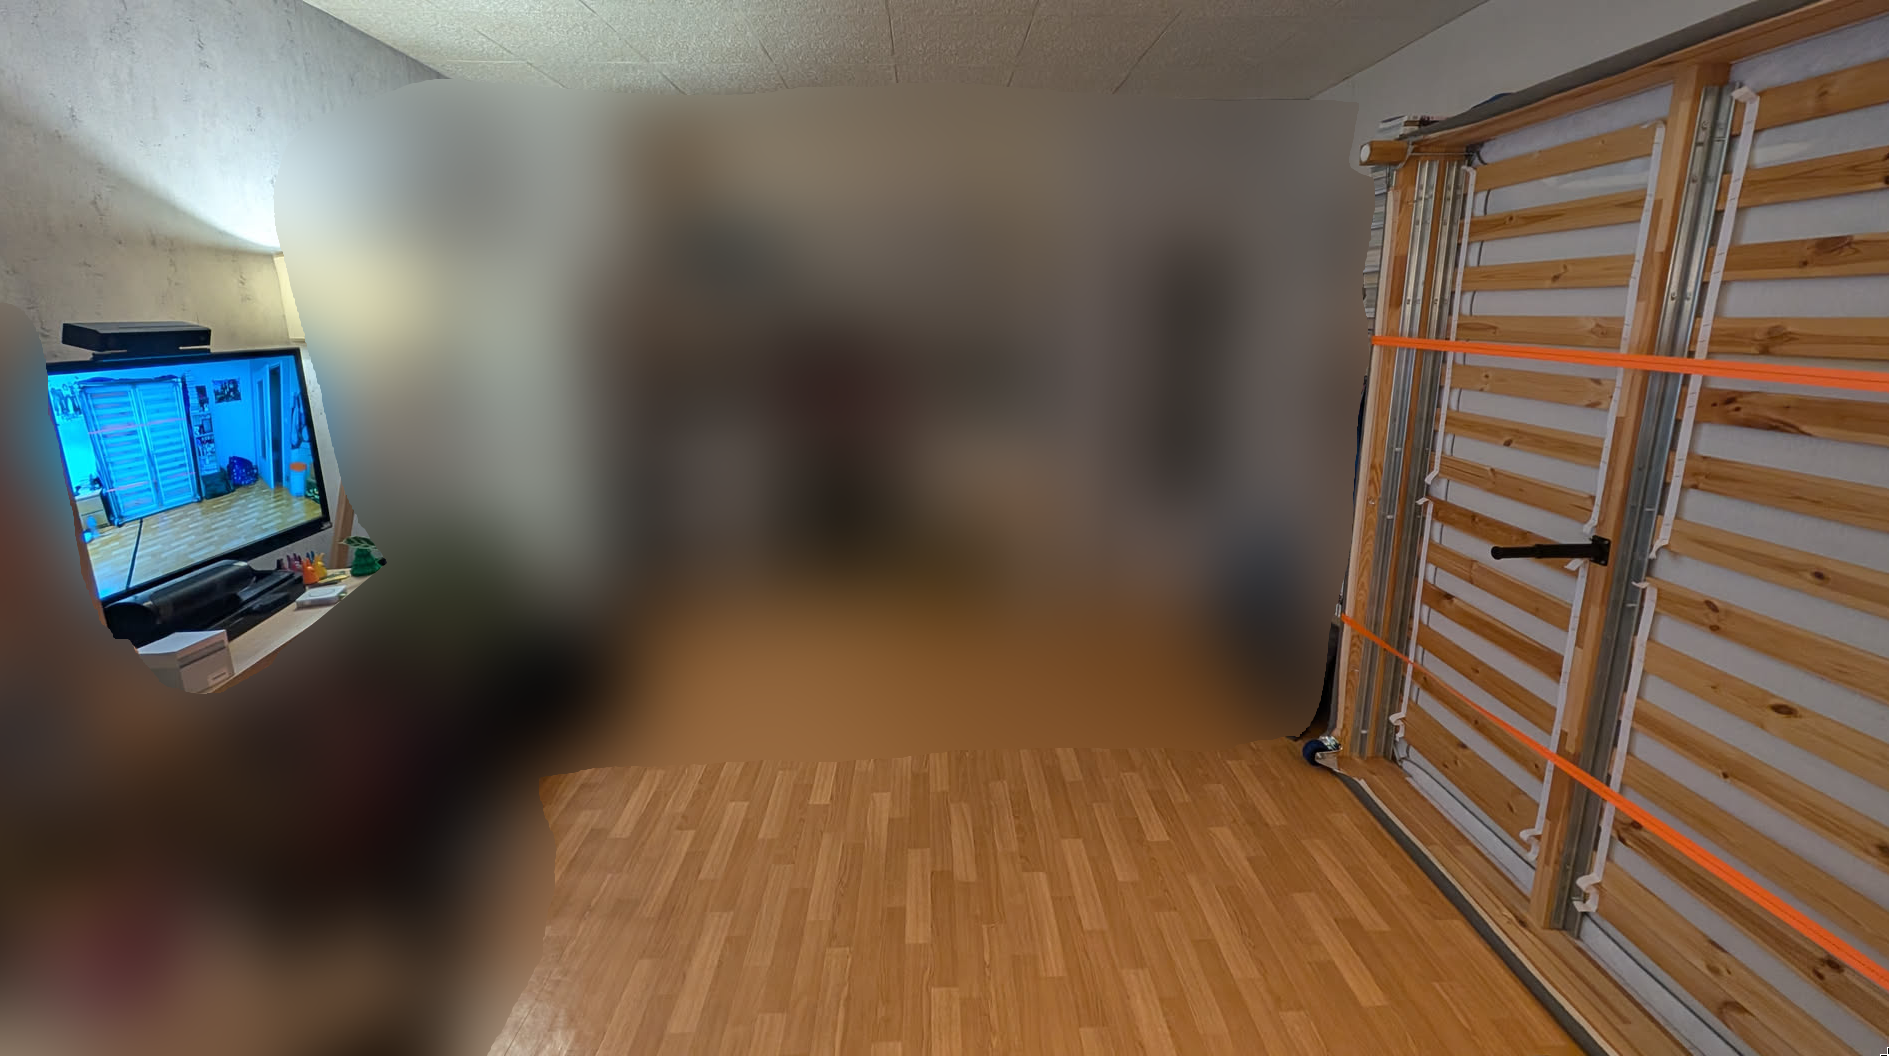
Finally, to keep the mattress in place when going in a vertical position, I used two ratchet straps that are pretty fast to secure and very sturdy.
Final result
Once lifted, the bed reveals a pretty large space in front of the TV/Kinect.
Now, with both the mini-PC configured and the Kinect connected to it, we could just stop here and everything will work BUT I did mention automations and over-engineering, so I’m not done yet and I will show in the 3rd and last post of this series how to configure the K8s cluster to automate everything.
References
- https://aur.archlinux.org/packages/libfreenect2
- https://github.com/OpenKinect/libfreenect2/pull/1197
- https://skarredghost.com/2016/12/02/the-difference-between-kinect-v2-and-v1/
- http://mfombaron.free.fr/mob/?tag=1-wire
- https://www.journaldulapin.com/2013/02/12/reutiliser-un-mirror-sous-mac-os-x/
- https://www.dailymotion.com/video/x7br7o
- https://web.archive.org/web/20140625050654/http://rfxcom.com/Downloads
- https://web.archive.org/web/20140626135449/http://rfxcom.com/Documents/RFXCOM%20implementation%20xPL.pdf