Upgrading your RGB with WLED, Aurora and OpenRGB
I was always interested in going furether than the pre-made RGB equipement by various manufacturers because each system was only compatible with only one brand (ex: iCUE, RGB Fusion, Asus RGB …) and that their RGB softwares were very unfinished and didn’t exploit the full potential of the RGB hardware.
First Attempt
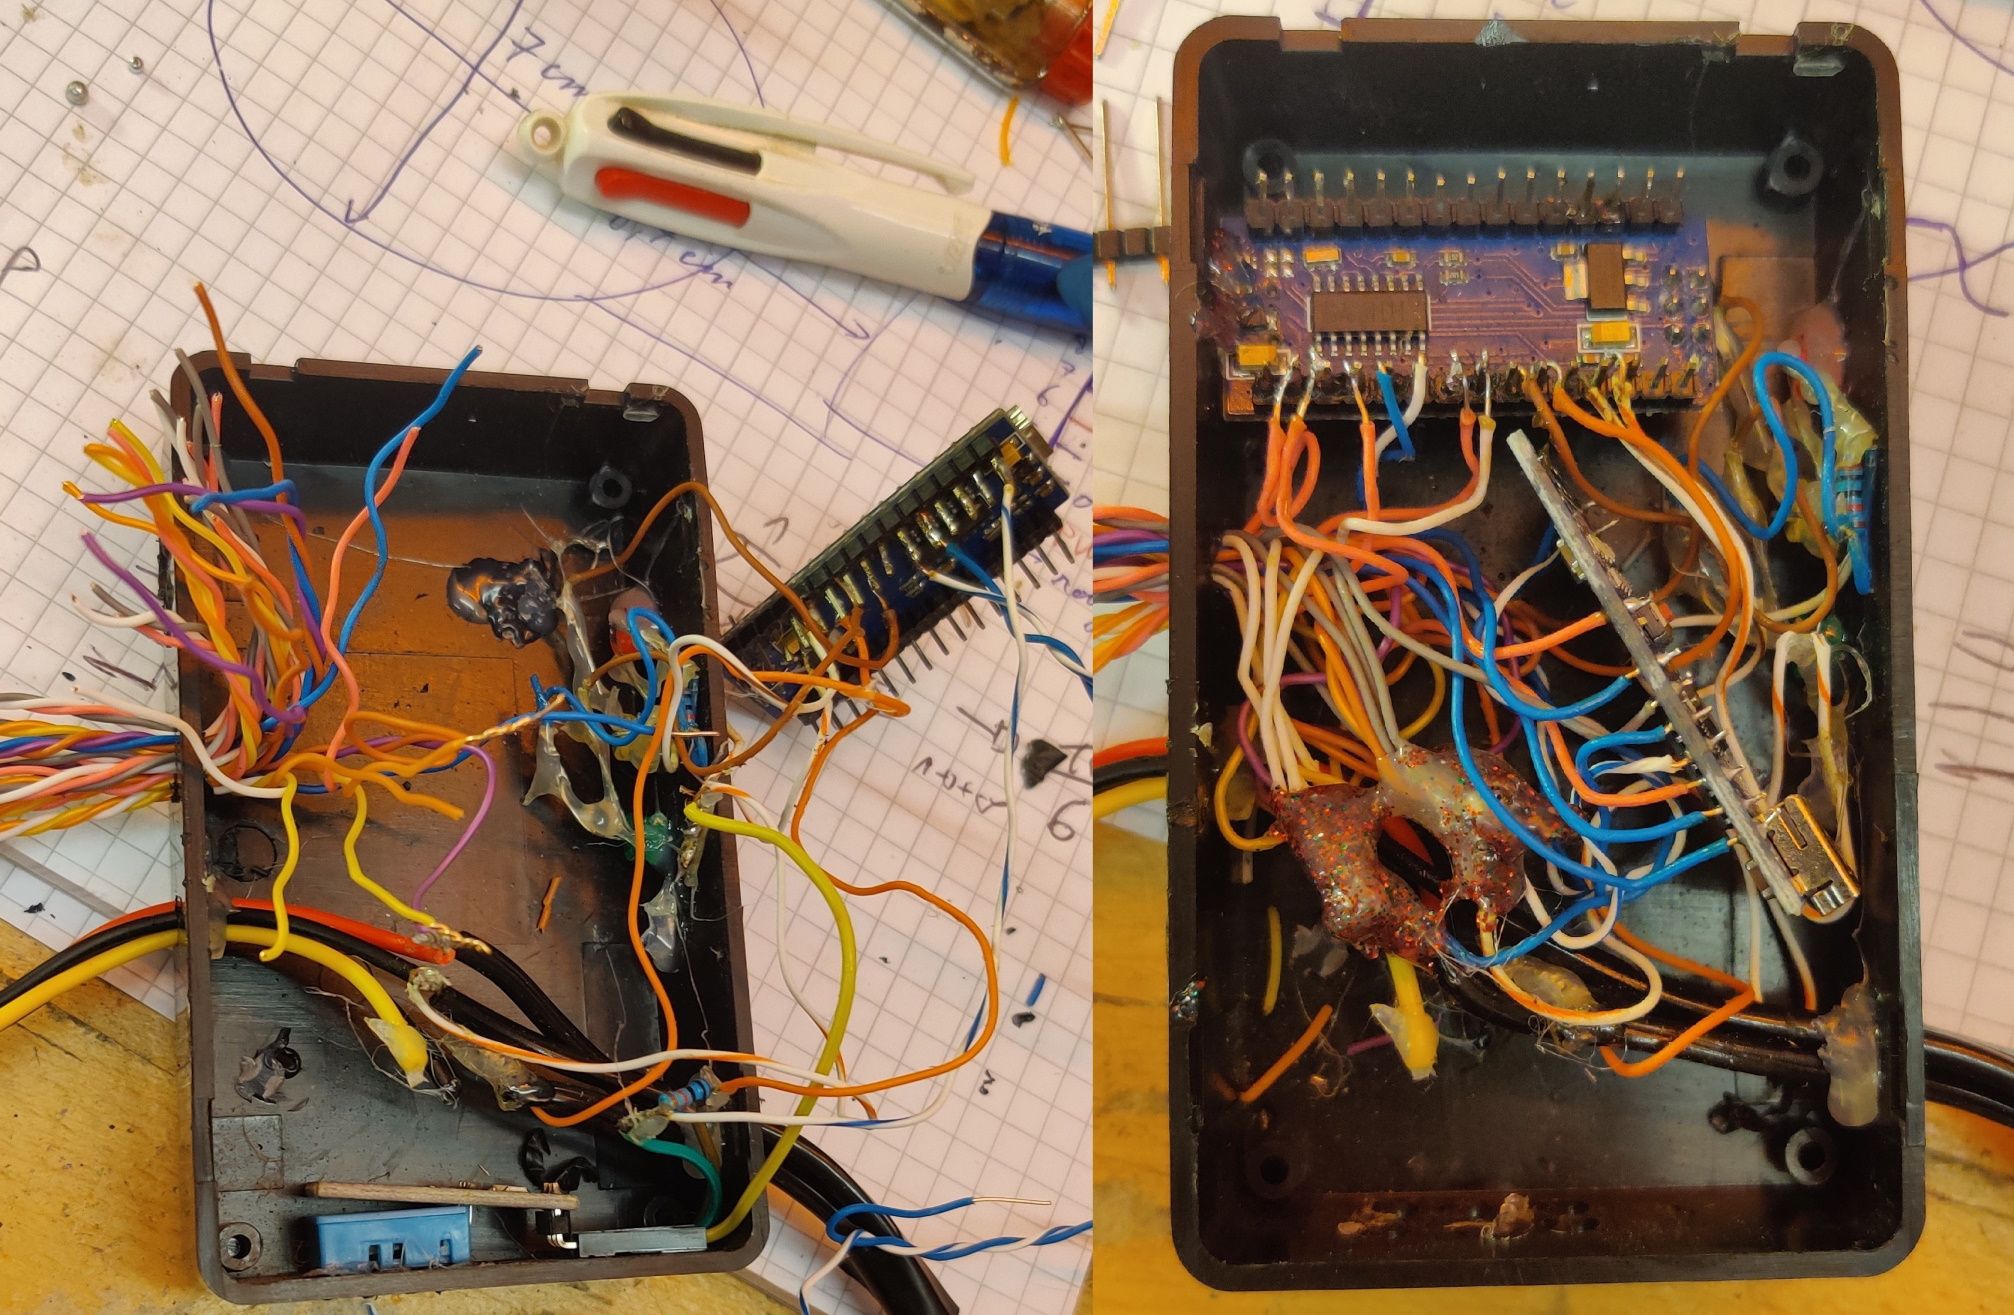
So, when I built my first desktop PC, I decided to create from scratch a custom RGB system. This was based on an arduino board, internally connected to my PC using USB. This arduino was controlling cheap adressable RGB strips (WS2812B) powered by my PSU in 5v. On the software side, I developped a custom C# application, LedControl. This was my first attempt at controlling my RGB leds.
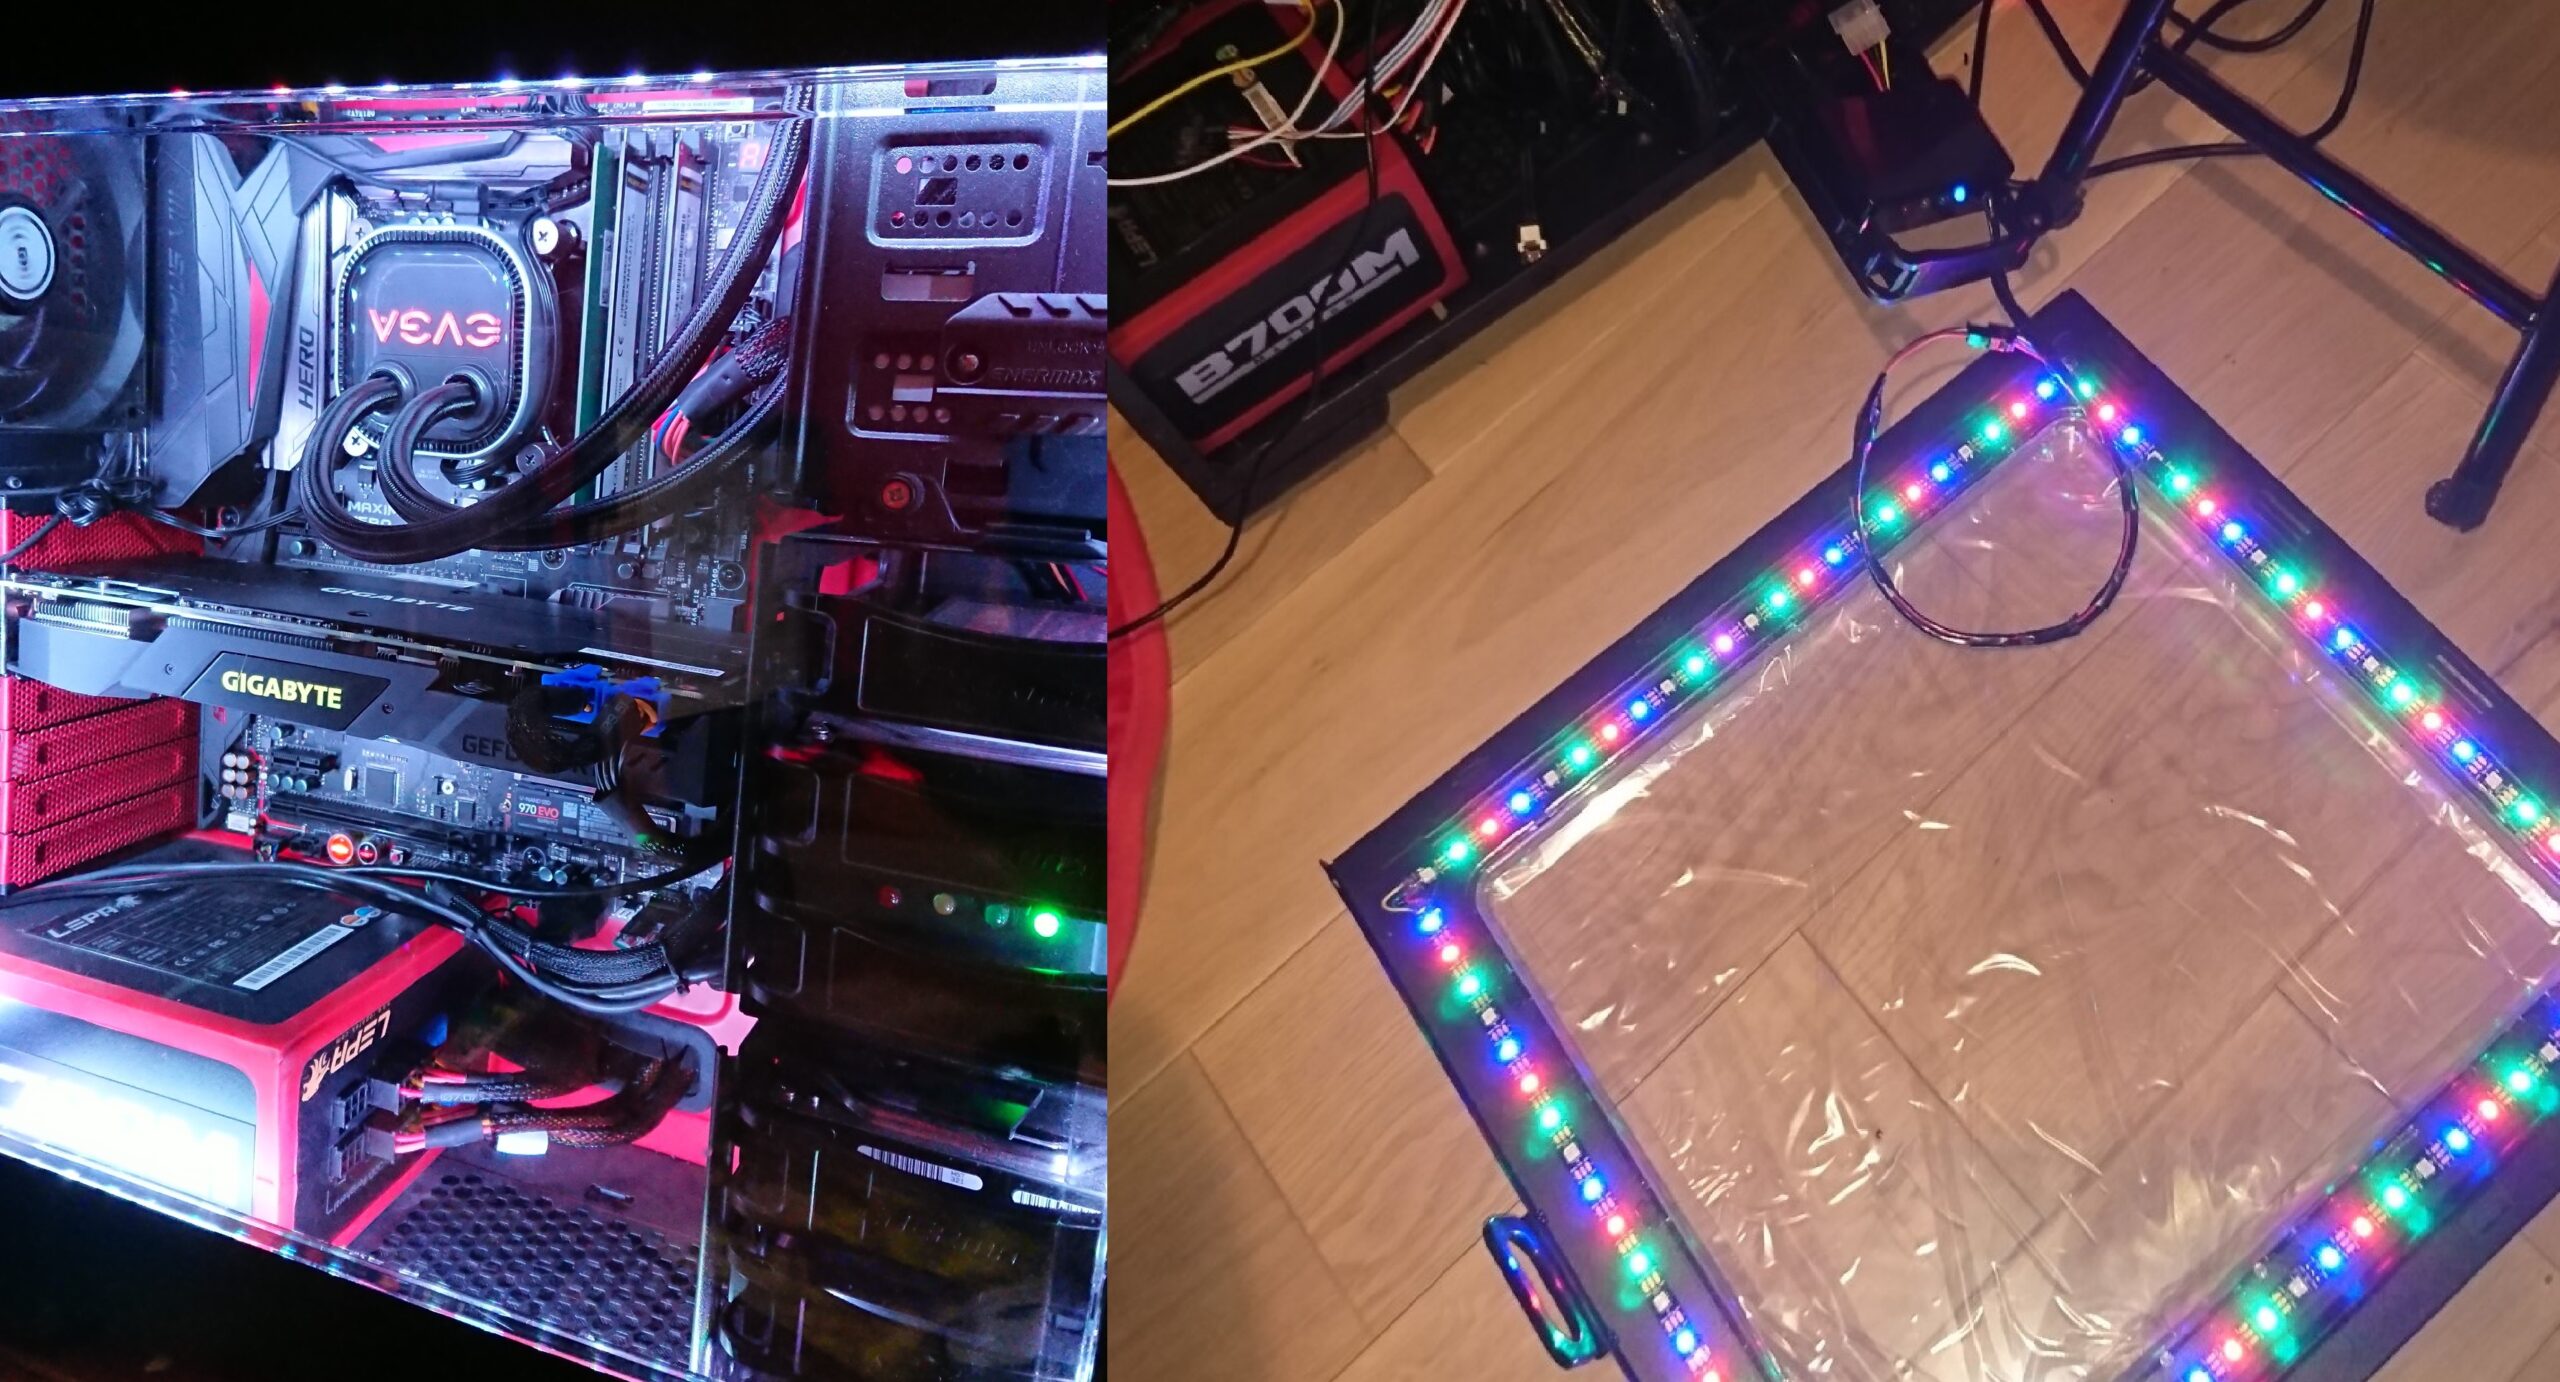
A bit later, while adding RGB fans, I discovered that they were using the same type of adressable leds. Unfortunately, only an input port was available, meaning that you were not able to chain the devices and control their leds individually. So, in order to control every led of my system, I needed to wire each fan data line to a dedicated port on the arduino. As there wasn’t enough ports on the nano (and that a mega was too big), I needed to add a second arduino.

This system was working quite well, my software was able to control each device and leds individually and to apply multiple effects at the same time (ex: GPU Temp reactive lighting for a fan, CPU Temp for another fan, and music reactive effect for the window’s leds). However it wasn’t able to interact with built-in RGB like the leds on the motherboard/GPU and also had a quite limited set of effects available.
Second Attempt
WLED
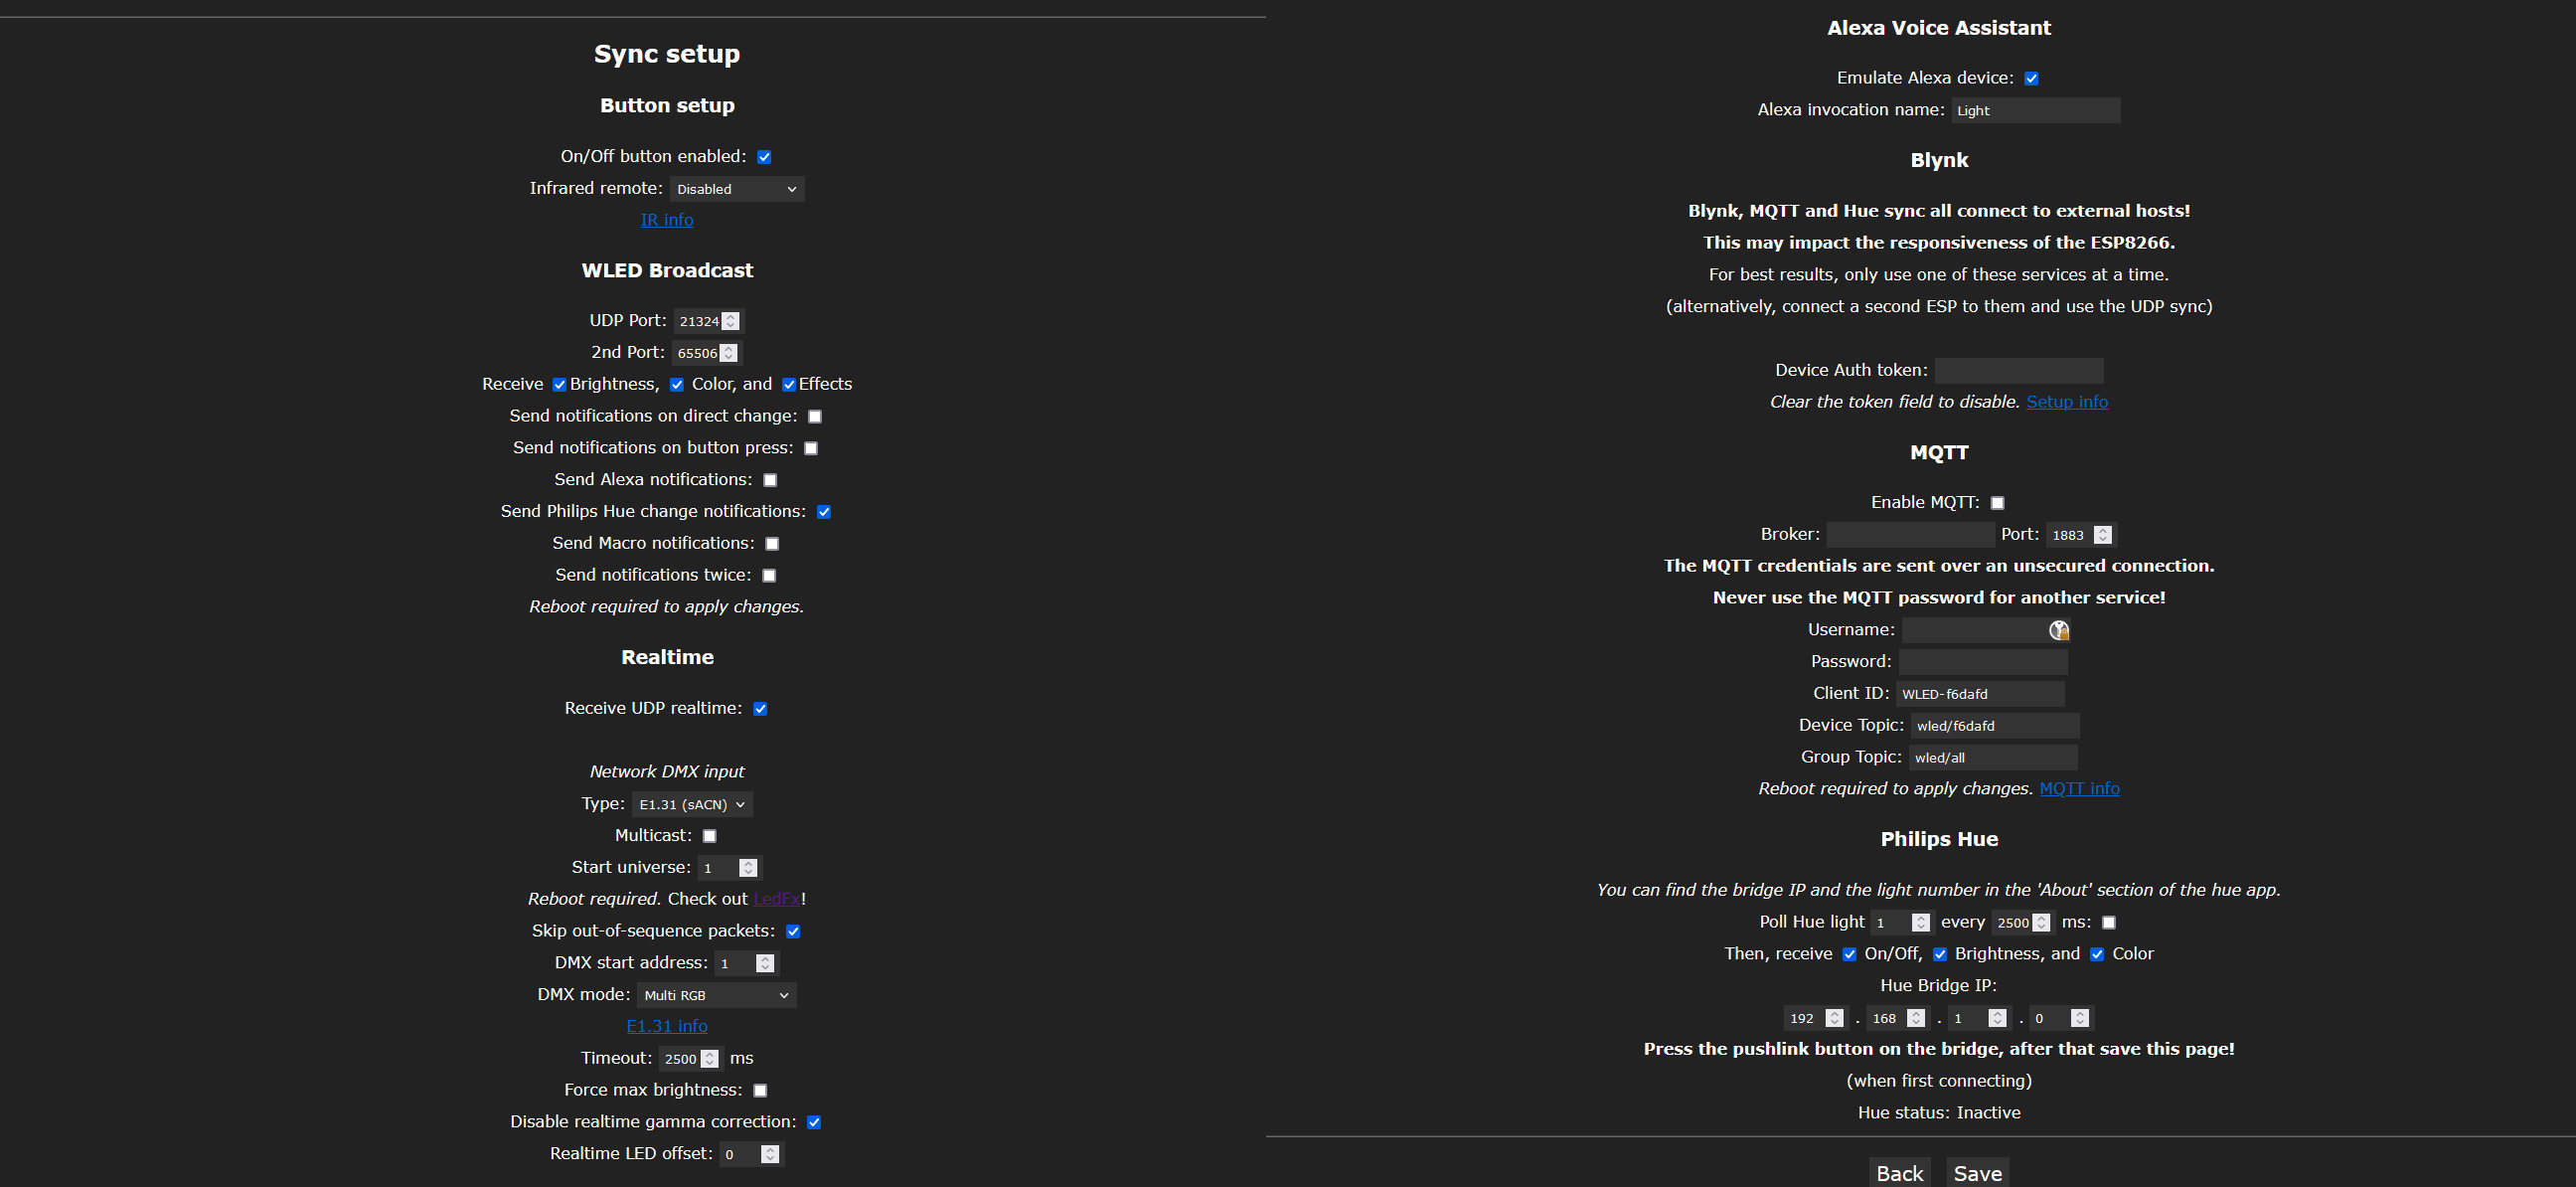
So, when I renewed my computer and bought a new case, I decided to completely change the RGB lighting system. A lot of things happened after I created my first solution, and the ESP8266/ESP32 were now very common and had received a lot of support from the opensource community. Among the incredible amount of projects, was WLED, a RGB control program for these wifi chips that allowed you to control various led strips, including the WS2812B from a web interface and much more. I decided to use this project as a base to control the WS2812B-based RGB in my PC. As mutli-pin control (required for my fans) wasn’t available in the provided firmware, I neded to slightly edit the source-code and recompile it. Starting from version 0.12.0, multi-strips are supported in the precompiled binaries and are easily configurables.
After wriring all my led strips, I connected my pc to the wireless hostpot created by the esp and configured the my home wifi credentials, and that’s it. I was now able to connect to the web ui of WLED and control my PC’s RGB from any device. WLED has a lot of really cool features such as synchronizing with other WLED devices, E1.31 support, an incredibly complete list of effects and the ability to define independant zones on the light strip.

OpenRGB
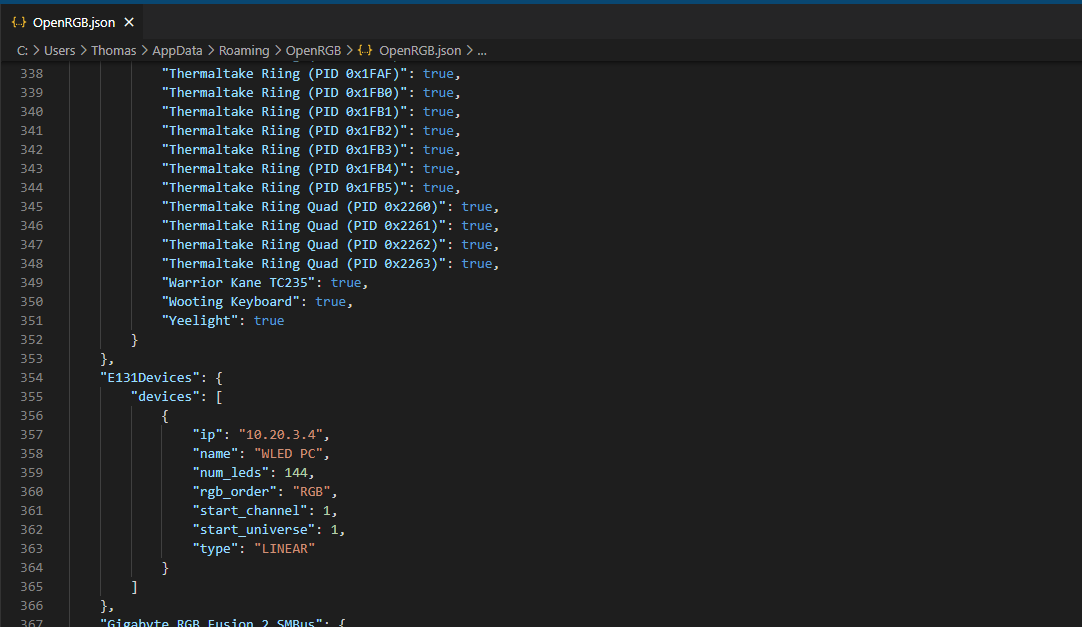
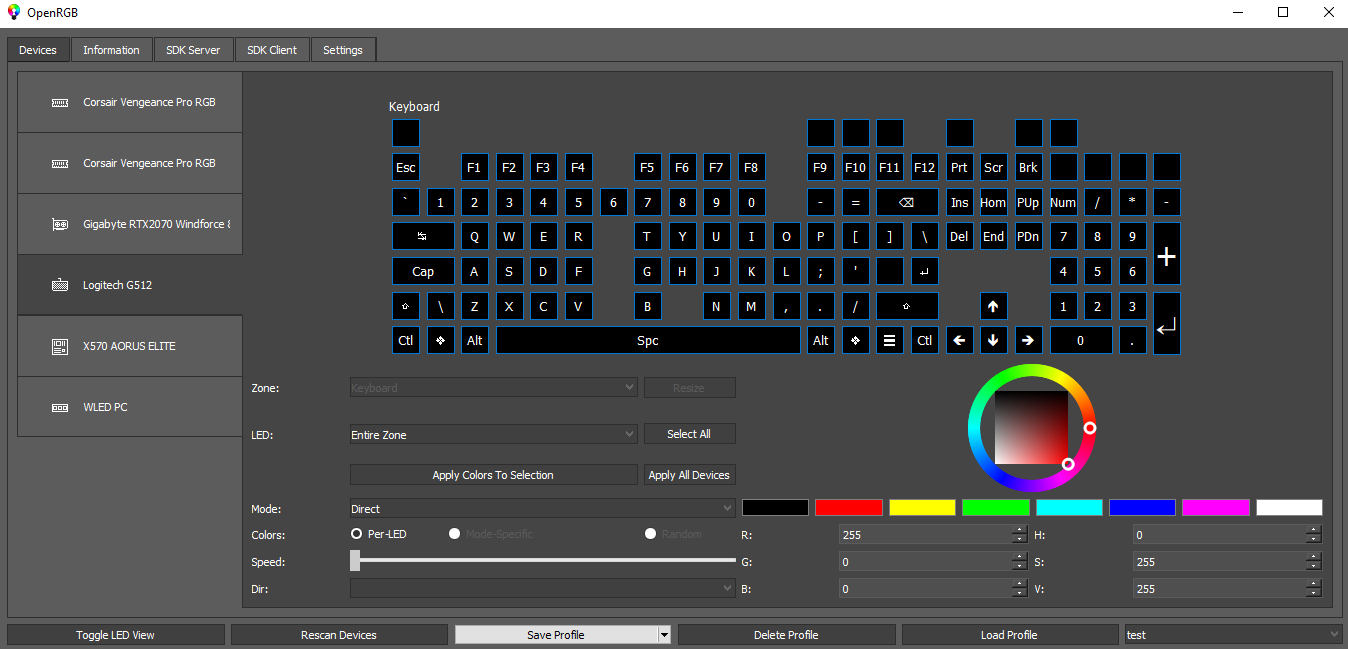
Once that the control of the WS2812B RGB was settled, I neded to find a way to control the build-in RGB of my motherboad, RAM, GPU and keyboard. That’s where another awesome software enters: OpenRGB. This is what is tieing everything together: OpenRGB is a cross-platform software that is able to control practically any RGB device from many manufacturers like Corsair, Asus, Gigabyte, HyperX, MSI … It also supports controlling devices using E1.31 and exposes an universal API to control all of them. Most of the devices are auto-detected but for E1.31 , you need to manually edit the configuration file in %appdata%/OpenRGB/OpenRGB.json to specify the IP of the device (here, our WLED esp). Also, keep in mind that access to some devices control interfaces (like SMBus) may be blocked by other softwares, especially anti-cheats like Vanguard.

Aurora
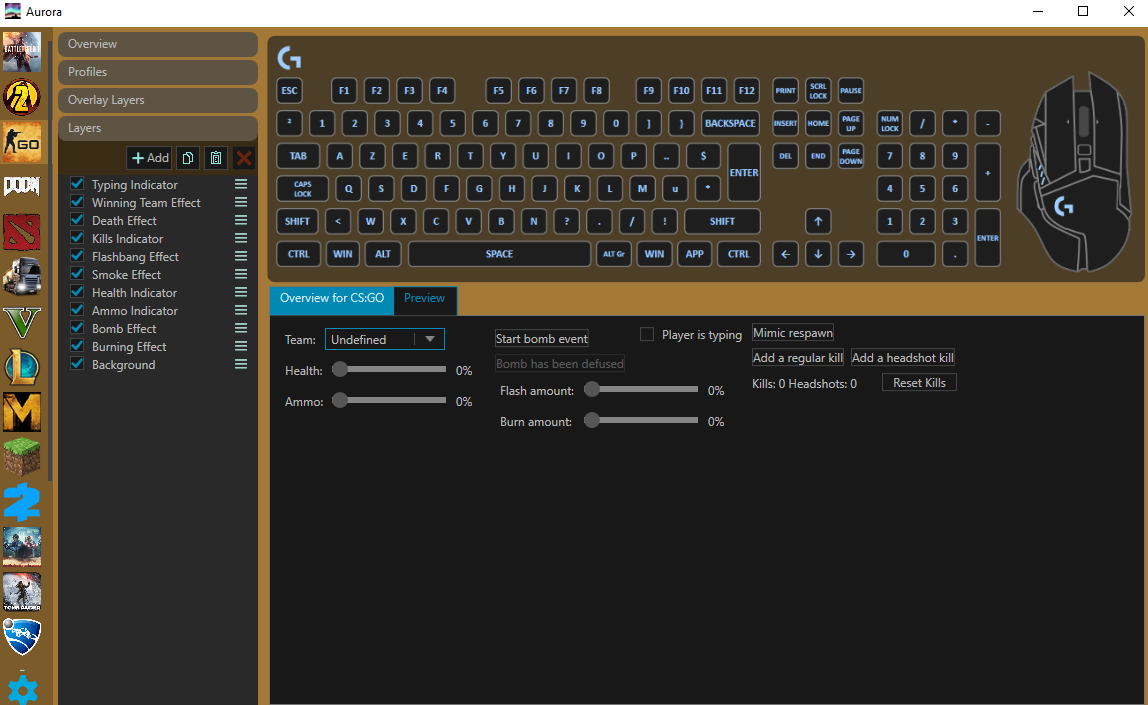
A first options is to use Aurora-Project, to interact in real time with some games and apply some effects based on the game’s data. Aurora supports many well-known games like CS:GO, Minecraft, LoL … and a lot of different devices and protocols, including OpenRGB. So we just need to enable OpenRGB in Aurora (it will automatically connect to your local OpenRGB instance) and start the OpenRGB API Server to be able to use these effects.

There are also some other software using the OpenRGB API, like KeyboardVisualizer (from the same author) that creates music-based lighting effects.
Custom effects
Another option is to use directly the OpenRGB API to create new effects. Fortunately a lot of wrappers in multiple languages already exists for this API. Here, we’ll be using python-openrgb.
We will take Forza Horizon 5 as an example (as this is the latest game that I played). This game is has an option in Settings > HUD and Gameplay to send UDP telemetry packets while playing, we will use this data to create our effects. To decode these packets we will use the ForzaDataPacket class from the forza_motorsport project. We will, in the first time, use a little script (test.py, see code below) to gather a bit of data and graph it with matplotlib, to have an idea of the evolution of these metrics.


We can then map these values to RGB colors using a custom script (see below) and send them to OpenRGB. To determine which key you want to light-up, you can click on Toggle LED View in OpenRGB to show the emplacements of your keys, you can then use keyboard.matrix_map[y][x] to get the correct led id. Also note that spaces between keys also counts as keys, for example, the F1 key has the id 2 (and not 1) because of the space between the escape key (id: 0) and this key. With this script, the 1-9 keys of the keyboard represent your position in a race, the line below represents the engine rpm, below is the speed and the last line is the power. The insert/suppr/page up/page down keys represent the slip ratio for each tire and the lines 1/4/7 2/5/8 and 3/6/9 on the numpad represent your car’s status (acceleration/brake/handbrake).

import socket
from openrgb import OpenRGBClient
from openrgb.utils import RGBColor, DeviceType
from numpy import interp

from fdp import ForzaDataPacket
# get fdp.py from https://github.com/nettrom/forza_motorsport

s = socket.socket(socket.AF_INET, socket.SOCK_DGRAM)
server_address = ("127.0.0.1", 1010)
s.bind(server_address)

print("####### Server is listening #######")


client = OpenRGBClient("127.0.0.1", 6742, "forza")
keyboard = client.get_devices_by_type(DeviceType.KEYBOARD)[0].zones[0]

props = [
    "speed",
    "fuel",
    "race_pos",
    "accel",
    "brake",
    "handbrake",
    "current_engine_rpm",
    "power",
    "tire_slip_ratio_FL",
    "tire_slip_ratio_FR",
    "tire_slip_ratio_RL",
    "tire_slip_ratio_RR",
    "is_race_on",
]


RED = RGBColor(255, 0, 0)
YELLOW = RGBColor(255, 255, 0)
ORANGE = RGBColor(255, 165, 0)
GREEN = RGBColor(0, 255, 0)
CYAN = RGBColor(0, 255, 255)
MAGENTA = RGBColor(255, 0, 255)
BLACK = RGBColor(0, 0, 0)

props_keys = {}
i = 0
for x in props:
    props_keys[x] = i
    i += 1

kb_black_keys = []
for i in range(len(keyboard.matrix_map)):
    for j in keyboard.matrix_map[i]:
        if j is not None:
            kb_black_keys.append(BLACK)


def value2color(val, min, max, inverted=False):
    red = [0, 1, 2, 3, 4]
    orange = [20, 21, 22, 23, 24]
    yellow = [30, 31, 32, 33, 34]
    green = [50, 51, 52, 53, 54]
    if inverted:
        colors = red + orange + yellow + green
    else:
        colors = (
            list(reversed(green))
            + list(reversed(yellow))
            + list(reversed(orange))
            + list(reversed(red))
        )
    return RGBColor.fromHSV(
        colors[round(interp(val, [min, max], [0, len(colors) - 1]))], 100, 100
    )


def keys2band(kb, start_line, start_col, nb):
    band = []
    n = 0
    for i in range(start_col, len(kb.matrix_map[start_line])):
        if kb.matrix_map[start_line][i] is not None:
            band.append(kb.matrix_map[start_line][i])
            n += 1
            if n > nb:
                break
    return band


KB_LINE1 = keys2band(keyboard, 3, 2, 10)
KB_LINE2 = keys2band(keyboard, 4, 2, 10)
KB_LINE3 = keys2band(keyboard, 5, 2, 10)


def value2band(val, val_min, val_max, band, colors):
    max = len(band) - 1
    nb_keys = int(interp(val, [val_min, val_max], [0, max]))
    i = 0
    for x in band[0:nb_keys]:
        colors[x] = value2color(i, 0, max)
        i += 1


client.clear()

while True:
    raw, address = s.recvfrom(1024)
    data = ForzaDataPacket(raw, "fh4").to_list(props)

    keyboard.colors = kb_black_keys.copy()

    if data[props_keys["race_pos"]] != 0:
        key = 10 if data[props_keys["race_pos"]] > 9 else data[props_keys["race_pos"]]
        keyboard.colors[keyboard.matrix_map[2][key]] = value2color(key, 1, 10)

    if data[props_keys["accel"]] > 0:
        keyboard.colors[keyboard.matrix_map[2][19]] = GREEN
        keyboard.colors[keyboard.matrix_map[3][19]] = GREEN
        keyboard.colors[keyboard.matrix_map[4][19]] = GREEN
        keyboard.colors[keyboard.matrix_map[5][19]] = GREEN

    if data[props_keys["brake"]] > 0:
        keyboard.colors[keyboard.matrix_map[2][20]] = CYAN
        keyboard.colors[keyboard.matrix_map[3][20]] = CYAN
        keyboard.colors[keyboard.matrix_map[4][20]] = CYAN
        keyboard.colors[keyboard.matrix_map[5][20]] = CYAN

    if data[props_keys["handbrake"]] > 0:
        keyboard.colors[keyboard.matrix_map[2][21]] = MAGENTA
        keyboard.colors[keyboard.matrix_map[3][21]] = MAGENTA
        keyboard.colors[keyboard.matrix_map[4][21]] = MAGENTA
        keyboard.colors[keyboard.matrix_map[5][21]] = MAGENTA

    if data[props_keys["is_race_on"]] > 0:
        keyboard.colors[keyboard.matrix_map[0][12]] = GREEN
        keyboard.colors[keyboard.matrix_map[0][13]] = GREEN
        keyboard.colors[keyboard.matrix_map[0][14]] = GREEN

    value2band(
        data[props_keys["current_engine_rpm"]], 0, 10000, KB_LINE1, keyboard.colors
    )
    value2band(data[props_keys["speed"]], 0, 100, KB_LINE2, keyboard.colors)
    value2band(data[props_keys["power"]], -500000, 500000, KB_LINE3, keyboard.colors)

    keyboard.colors[keyboard.matrix_map[2][16]] = value2color(
        data[props_keys["tire_slip_ratio_FL"]], -30, 30
    )
    keyboard.colors[keyboard.matrix_map[2][18]] = value2color(
        data[props_keys["tire_slip_ratio_FR"]], -30, 30
    )
    keyboard.colors[keyboard.matrix_map[3][16]] = value2color(
        data[props_keys["tire_slip_ratio_RL"]], -30, 30
    )
    keyboard.colors[keyboard.matrix_map[3][18]] = value2color(
        data[props_keys["tire_slip_ratio_RR"]], -30, 30
    )

    keyboard.show()
import socket
from fdp import ForzaDataPacket
from matplotlib import pyplot
import time
# Create a UDP socket
s = socket.socket(socket.AF_INET, socket.SOCK_DGRAM)
# Bind the socket to the port
server_address = ("127.0.0.1", 1010)
s.bind(server_address)
print("Do Ctrl+c to exit the program !!")
props = []
arr = []
t_max = time.time() + 30
props = ["speed"]
# accel, brake, handbrake -> 1 or 0
# current_engine_rpm [10 000], power [500 000]
# speed [200], race_pos [0,10]
for i in range(len(props)):
arr.append([])
while time.time() < t_max:
print("####### Server is listening #######")
data, address = s.recvfrom(1024)
df = ForzaDataPacket(data, "fh4")
d = df.to_list(props)
for i in range(len(d)):
arr[i].append(d[i])
for i in range(len(props)):
pyplot.plot(list(range(len(arr[i]))), arr[i], label=props[i])
pyplot.legend()
pyplot.show()Home Assistant
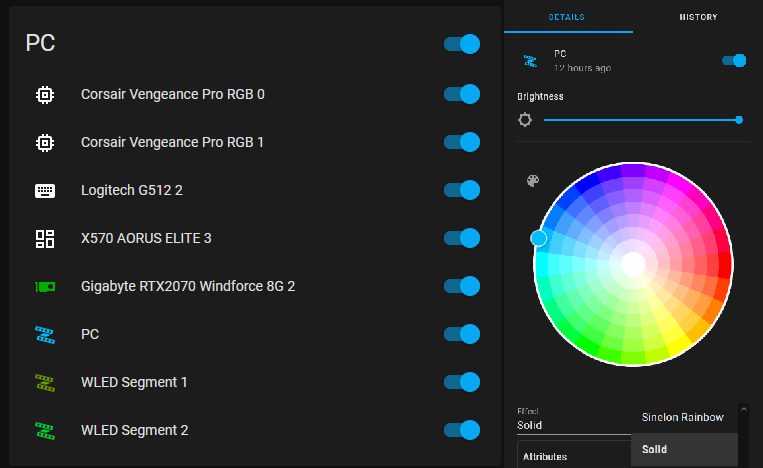
In addition to your RGB software on your PC, you can also control everything from your home automation system. For example, in Home Assistant, you can configure the WLED integration to control your PC’s led stips. Using HACS, you can also install the OpenRGB integration, which will then allow you to control all of your computer’s RGB devices using OpenRGB.
Conclusion
We now have a complete RGB lighting system for our computer with dynamic game-based lighting effects. As written in the last paragraphs, we can even control it from python scripts or home automation systems which opens the door to even more powerful connections (for example make your first fan blink when you receive a new message, or sync your RGB with an ambilight system …).